Following are the Options of Configuration Page:
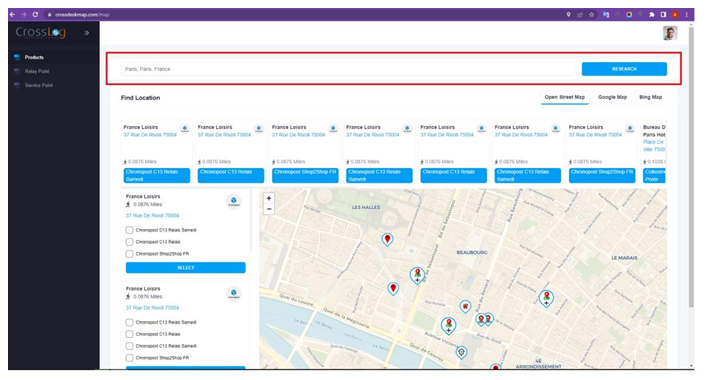
Display Map:
We are providing two options for this feature.
Select Map:
Using this feature we can enable maps on map page. There are three maps we have right now. Here we are providing three maps as below.
- Google Map
- Open Street Map
- Bing Map
Select Design:
This is a color picker with help of it we can change the color of theme.
Select Color of Marker:
This is also color picker but with help of this color picker we can change a color of location marker.
Limit:
By help of this option user can update the limit of relay point locations.
Carrier service:
User could be select that service related location with help this option.
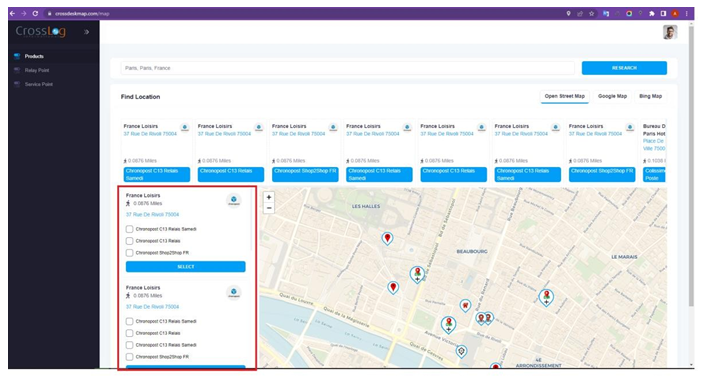
Location Panel:
We can change the position of Vertical Location box with help of it as well as it can be hide. Here we are providing three controls as below:
Right: User can move Vertical location box at right position.
Left: User can move Vertical location box at left position.
No: User can hide the Vertical location box.
Right / Left Panel Option With Images:
This options allows user to show or hide location images from Vertical location box.
Yes: Show images.
No: Hide images.
Top Map Option:
Horizontal location box can be hide or show with these below options
Show Logo Option:
Distance:
We can change location distance in kilometer or mile with help of this option. here we are providing two controls as below:
Select Home Icon:
User could be change the default home icon with help of this option.
Select Pointer Icon:
User could be change the location pointer with help of this option.
Languages:
This option will help you for select language.
Default Language: When user selects this option application detects that country language and open in it.
Manual Language: When user selects this option application so user will have to select language manually.
Update icon:
User can be change the default icon with help of this option.
Remove Icon:
User can be removing the default icon with help of this option.
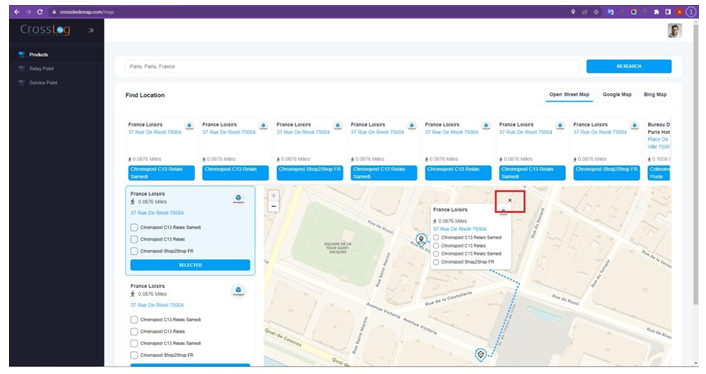
See The Time Schedule of Shops:
Users can see the whole week of closing and opening AM/PM time of the shop with the help of the below options.
Display Top Hours: Users can see the closing and opening times of the shop in a horizontal location panel with the help of this option.
Display Side Hours Users can see the closing and opening times of the shop in the vertical location panel with the help of this option.
Display Map Hours Users can see the closing and opening times of shops in the map location pop-up with the help of this option.
How to Crop Your Location Icon Image:
Our app makes it simple to customize your location icon image. Follow these easy steps to crop the image to your liking:
Step 1: Choose Your Image
- Open the app and locate the location icon section in map configuration page.
- Click on the “Update” button. Step 2: Select Your Image
- A window will pop up, showing your computer’s files and folders.
- Navigate to where your image is saved on your Windows PC.
- Click on the image file to select it.
- Click the “Open” button.
Step 3: Adjust the Crop
- The app will now show your chosen image in the cropping window.
- You’ll notice a box around the image – this is the cropping area.
- Drag the corners of the box to adjust the crop area.
- You can also make the box bigger or smaller by dragging the edges.
Step 4: Preview Your Crop
- As you adjust the crop, you’ll see a preview of the cropped image alongside the original.
- This preview helps you visualize how your cropped image will look.
Step 5: Save Your Crop
- When you’re satisfied with the crop, look for the “Save” or “Apply” button.
- Click the button to save your cropped image.
- Reopening the Crop Window
If you want to re-crop your image, follow these steps:
- Find the “Update” button and click it again.
- This will open the window to select an image from your PC.
- After selecting an image, you’ll be taken back to the cropping window.
- Adjust the crop as needed, then save your updated cropped image.
That’s it! You’ve successfully cropped and updated your location icon image. For further assistance, don’t hesitate to contact our support team.
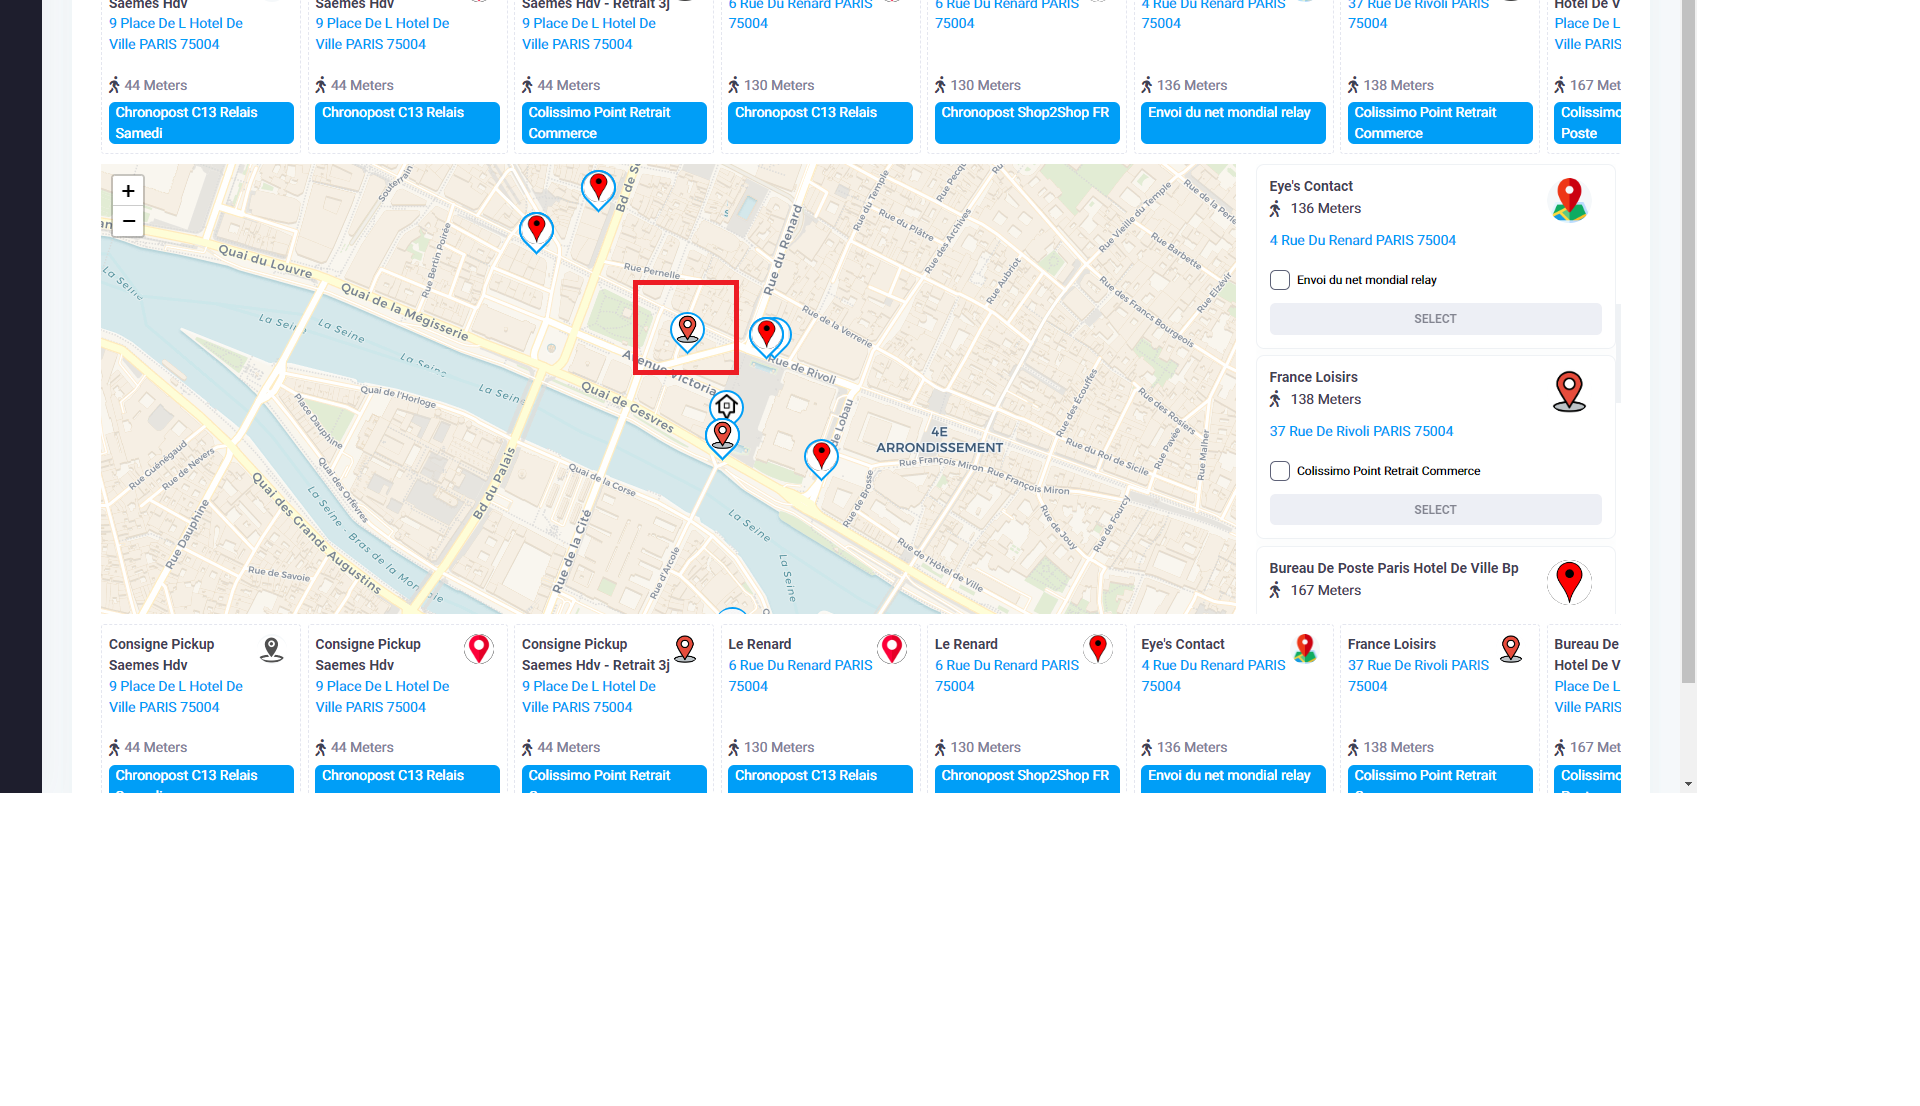
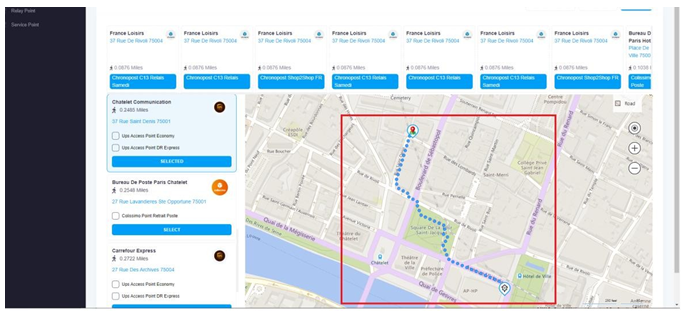
Divide Maps into Two Parts:
With the “Divide Maps into Two Parts” feature, users can split the map and location detail pop-up into two sections: the right side displays the map, and the left side displays the location detail pop-up. This feature offers users a convenient way to view both the map overview and specific location information simultaneously.
How It Works:
1. When users enable the “Divide Maps into Two Parts” option, the application dynamically divides the interface into two sections: the right section for the map and the left section for the location detail pop-up.
2. The map remains interactive on the right side, allowing users to zoom, pan, and interact with markers as needed.
3. The left section displays the location detail pop-up, providing information such as location name, address, attributes, and any attached media.
4. Users can easily adjust the division between the map and the location detail pop-up by dragging a resizing handle that separates the two sections. This allows for a customizable viewing experience.
Benefits:
Enhanced Contextual View: By combining the map and location details, users can gain a deeper understanding of a specific location’s context while retaining a broad map overview.
Efficient Decision-Making: Users can quickly evaluate location relevance on the map while accessing detailed information in real-time, streamlining their decision-making process.
Seamless Exploration: The feature facilitates effortless exploration of new areas by providing geographical context alongside comprehensive location attributes.
Use Cases:
Trip Planning: Users planning trips can assess location details while visualizing the entire trip route on the map.
Research and Analysis: Researchers and analysts can utilize the combined view to analyze geographic trends and study specific location attributes simultaneously.
On-the-Go Information: Users navigating unfamiliar areas can view real-time navigation updates on the map while referring to location information on the left.
Use Numbers for Locations:
Introducing the “Use Numbers Use Numbers” feature! When activated, this feature simplifies your map view by showing sequential numbers in place of detailed location information. This streamlined presentation makes it easy to follow the order of your locations while maintaining a clutter-free interface.
How It Works:
1. Upon enabling the “Use Numbers” option, the map will update to show a series of sequential numbers, each corresponding to a specific location.
2. As you interact with the map, these numbers provide a clear sequence of your locations. The numbers appear on the map markers or in proximity to them.
Benefits:
Simplified Exploration: By temporarily hiding detailed information, you can focus on the overall arrangement and sequence of your locations, allowing for a clean and uncluttered map view.
Efficient Navigation: The sequential numbers guide you effortlessly from one location to another, promoting an intuitive exploration experience.
Quick Information Access: Need specific details about a location? Simply interact with the numbered marker to reveal a pop-up with all the necessary information.
Use Cases:
Route Following: Follow a specific sequence of locations, making navigation along a predefined route straightforward.
Quick Overviews: When a comprehensive view is needed, the sequential numbers offer an immediate understanding of location distribution without the distraction of too much detail.
In-the-Moment Exploration: Exploring on-the-go becomes a breeze as you navigate the sequential numbers and access detailed data only when required.
Note: This feature can be activated or deactivated as needed, giving you the flexibility to choose between a simplified view and a more detailed one.
Use Numbers:
Introducing the “Sequential Number Markers” feature, now with a refined twist! With this enhancement, each location marker’s sequential number corresponds directly to the order of your locations. This seamless alignment makes navigation and tracking a breeze.
How It Works:
- Enable the “Sequential Number Markers” option, and watch as each location marker now proudly displays its own sequential number.
- These numbers are meticulously ordered to mirror the arrangement of your locations. The first location receives marker number one, the second gets number two, and so on.
- As you interact with the map, the numbers on the markers remain synchronized with the sequential order, providing you with an intuitive visual guide.
Benefits:
Precision Navigation: The direct alignment of sequential numbers with the location order ensures a clear path to follow while navigating your points of interest.
Instant Recognition: Quickly and effortlessly recognize the sequence of locations directly from their corresponding marker numbers, enhancing your overall understanding.
Efficient Decision-Making: With an accurate marker-number correlation, you can efficiently plan your route and explore with confidence.
Use Cases:
Seamless Route Tracking: The synchronized numbers help you track your route effortlessly, giving you a straightforward path to follow from start to finish.
Visualized Planning: Gain immediate insight into the order of locations, ideal for assessing distribution and organizing your exploration journey.
Fluid Exploration: When you’re out and about, easily identify each location by its marker number for smooth, uninterrupted exploration.
Note: You retain full control over this feature’s activation, allowing you to align the experience with your navigation preferences.
Select Icon:
The “Select Icon” Selection feature in our application’s configuration page allows users to choose from three different icon options: User Icon, Service Icon, and Relay Point Icon. This feature enables users to personalize the appearance of certain elements within the application.
Icon Options:
User Icon: Selecting the “User Icon” option will change the icon associated with user-related elements in the application. This typically includes profile pictures, avatars, or other user-specific visual representations.
Service Icon : Choosing the “Service Icon” option will update the icon used for service-related elements in the application. This can include icons for services, products, or any features related to services offered.
Relay Point Icon : The “Relay Point Icon” selection will modify the icon for relay points or similar elements within the application. This can apply to locations, waypoints, or any relevant points of interest.
Distance With Only A Number:
The “Distance With Only A Number” feature in our application simplifies the display of distance and sequence numbers, offering a user-friendly way to view distances along with sequential numbering. By hiding additional location data, this feature streamlines the user experience and enhances clarity.
Usage:
Accessing the Feature:
Navigate to the relevant section within the app where distance and sequence numbers are displayed.
Displaying Information
- Distance: Represents the distance between points.
- Sequence Number: Provides a sequential number starting from 1 and continuing indefinitely.
Benefits:
- Simplified Information: Viewing only distance and sequence numbers removes unnecessary complexity.
- Sequential Reference: Quickly identify the sequence of items or points.
- Enhanced Clarity: By concealing extra location data, the user experience is more straightforward and easier to understand.